Home
How-to Guides
How to Add Captions and Subtitles in Windows Media Player

How to Add Captions and Subtitles in Windows Media Player

table of contents
Hungry For More?

Luckily for you, we deliver. Subscribe to our blog today.

Thank You for Subscribing!

A confirmation email is on it’s way to your inbox.

Share this post

Despite its age, Windows Media Player still boasts immense popularity even today. While great for displaying media, adding closed captions can prove to be a more complex feat. Fortunately, this simple guide will take you through the different ways to add captions and foreign subtitles to your videos.

Before you proceed with this tutorial, ensure that you have your closed caption or subtitle file ready. If you don’t already have one, that’s fine. Just head over to Rev where you can order quality captions and subtitles. Which file type you should order, depends on the method you’ll be using. For closed captions and subtitles, .SRT files will be best. However, for encoded captions and subtitles, .SMT files can also be used.

Adding a Sidecar File to Windows Media Player 

With this method, your captions or foreign subtitles won’t be hardcoded into the video. Instead, they will simply be overlaid on top. Hence, viewers can choose whether to have them on or not. However, in cases where your audience may not be able to toggle them, this may not be the best choice.

1. Prepare Video and Caption Files

Prior to importing your files, ensure they both have the same name and are saved in the same location on your device. Otherwise, Windows Media Player won’t be able to automatically detect the caption file. This is important because there is no way to manually add captions or subtitles.

2. Import Video

First, locate the video file on your device and right click on it. This should prompt a menu to appear. From the menu, select Open with  and then choose Windows Media Player. Once inside the player, ensure that it’s in Library Mode using CTRL + F1. If you leave the player in Skins Mode, your captions may not display as few of the skins support closed captions or foreign subtitles. 

<img decoding="async" src="https://s3.amazonaws.com/clearvoice-media/asg_B8asZCleUVv4RfYv%2Fart_GtxDif4w3HRw7XsY%2F1613174940101-IMG-7186.jpg" alt="">

3. Order a Caption File from a Professional Service

You can upload your video to Rev captioning services and get a caption file back that you can add into Windows Media Player.

4. Enable Captions 

Next, select Tools from the menu bar. Thereupon, choose Options from the generated dropdown menu. Afterwards, a dialogue box with several tabs will appear. Click on the Security tab and check the box Show local captions when present. Finally, select the Okay button.

5. Turn On Captions 

To display the captions, right click anywhere in the player window. This will prompt a dropdown menu from which you should select Lyrics, captions and subtitles. Then, choose On if available from the subsequent menu. You should now be able to see your closed captions or foreign subtitles.

Adding Permanent (Burned-In) Captions into Videos with a Captioning Service

Using this method, your captions will be encoded into your video thus making them appear all the time. Although, viewers won’t be able to toggle them on and off, everyone will be able to see them regardless of their set up. 

1. Go to the Rev.com Captioning Service Page

Start by going here and clicking “Get Started”.

2. Upload Video File

Upload your video here or paste a URL if your video is on a public URL on the internet.
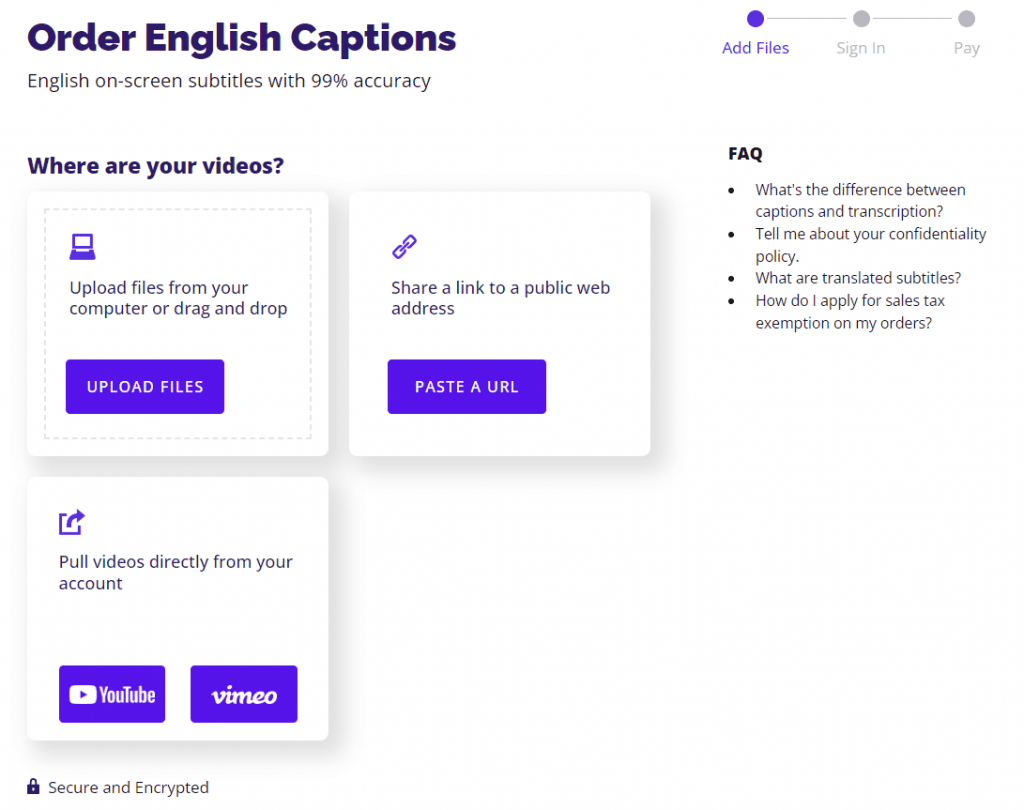
Order Rev Caption

3. Select “Burned-In Captions”

Be sure to select “Burned-In Captions” in checkout. This means you will get a downloadable video file that is fully captioned.

Burned-in Caption pricing

4. Checkout

Finish the checkout process and select any additional captioning options you want.

5. Download your Fully Captioned Video

Our professional captioners will get to work and will complete your video in a few hours. When your video is finished, you will receive an email and will be able to download your fully captioned video!

Whew. finally done! You should now be able to open closed caption and foreign subtitle files in Windows Media Player. Although it seems like a lot of work, it doesn’t have to be. With Rev, you can quickly order quality closed captions and subtitles, as well as burned-in captions and subtitles from $1.99/minute.

Captioning on more video platforms

Subscribe to the Rev Blog

Lectus donec nisi placerat suscipit tellus pellentesque turpis amet.

Share this post

Subscribe to The Rev Blog

Sign up to get Rev content delivered straight to your inbox.

General

How to Add Captions and Subtitles in Windows Media Player

Despite its age, Windows Media Player still boasts immense popularity even today. While great for displaying media, adding closed captions can prove to be a more complex feat. Fortunately, this simple guide will take you through the different ways to add captions and foreign subtitles to your videos.

Before you proceed with this tutorial, ensure that you have your closed caption or subtitle file ready. If you don’t already have one, that’s fine. Just head over to Rev where you can order quality captions and subtitles. Which file type you should order, depends on the method you’ll be using. For closed captions and subtitles, .SRT files will be best. However, for encoded captions and subtitles, .SMT files can also be used.

Adding a Sidecar File to Windows Media Player 

With this method, your captions or foreign subtitles won’t be hardcoded into the video. Instead, they will simply be overlaid on top. Hence, viewers can choose whether to have them on or not. However, in cases where your audience may not be able to toggle them, this may not be the best choice.

1. Prepare Video and Caption Files

Prior to importing your files, ensure they both have the same name and are saved in the same location on your device. Otherwise, Windows Media Player won’t be able to automatically detect the caption file. This is important because there is no way to manually add captions or subtitles.

2. Import Video

First, locate the video file on your device and right click on it. This should prompt a menu to appear. From the menu, select Open with  and then choose Windows Media Player. Once inside the player, ensure that it’s in Library Mode using CTRL + F1. If you leave the player in Skins Mode, your captions may not display as few of the skins support closed captions or foreign subtitles. 

<img decoding="async" src="https://s3.amazonaws.com/clearvoice-media/asg_B8asZCleUVv4RfYv%2Fart_GtxDif4w3HRw7XsY%2F1613174940101-IMG-7186.jpg" alt="">

3. Order a Caption File from a Professional Service

You can upload your video to Rev captioning services and get a caption file back that you can add into Windows Media Player.

4. Enable Captions 

Next, select Tools from the menu bar. Thereupon, choose Options from the generated dropdown menu. Afterwards, a dialogue box with several tabs will appear. Click on the Security tab and check the box Show local captions when present. Finally, select the Okay button.

5. Turn On Captions 

To display the captions, right click anywhere in the player window. This will prompt a dropdown menu from which you should select Lyrics, captions and subtitles. Then, choose On if available from the subsequent menu. You should now be able to see your closed captions or foreign subtitles.

Adding Permanent (Burned-In) Captions into Videos with a Captioning Service

Using this method, your captions will be encoded into your video thus making them appear all the time. Although, viewers won’t be able to toggle them on and off, everyone will be able to see them regardless of their set up. 

1. Go to the Rev.com Captioning Service Page

Start by going here and clicking “Get Started”.

2. Upload Video File

Upload your video here or paste a URL if your video is on a public URL on the internet.

Order Rev Caption

3. Select “Burned-In Captions”

Be sure to select “Burned-In Captions” in checkout. This means you will get a downloadable video file that is fully captioned.

Burned-in Caption pricing

4. Checkout

Finish the checkout process and select any additional captioning options you want.

5. Download your Fully Captioned Video

Our professional captioners will get to work and will complete your video in a few hours. When your video is finished, you will receive an email and will be able to download your fully captioned video!

Whew. finally done! You should now be able to open closed caption and foreign subtitle files in Windows Media Player. Although it seems like a lot of work, it doesn’t have to be. With Rev, you can quickly order quality closed captions and subtitles, as well as burned-in captions and subtitles from $1.99/minute.

Captioning on more video platforms

The event's speakers are:

No items found.